
High-quality sleep is having its wellness moment. Across socials and the internet, it seems we’ve collectively decided that sleep is our newest health priority, and I’m here for it. While I don’t have all the tips and tricks to getting better sleep, I can help you DIY your way to a better bedroom.
There are a lot of variables to a good night’s sleep, and even more to the perfect bedroom sanctuary. This DIY headboard hack might not help you sleep longer or more deeply, but it certainly can go a long way to setting the peaceful vibe you need to get those Z’s.
If your room is missing that final touch, and the wall behind your bed could use some dimension, this DIY headboard is for you.
Do you need a headboard?
If you don’t want a headboard for your space, you certainly don’t need one. But if you want to sleep like you’re in a luxury hotel room every night, a headboard can certainly add that upscale flair.
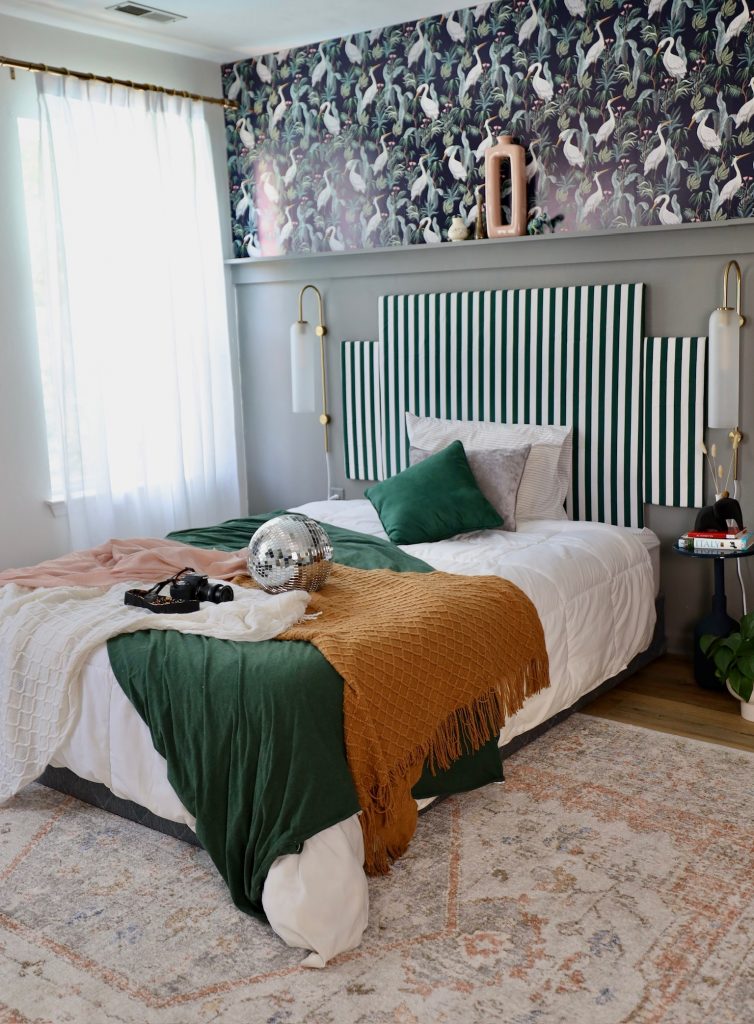
This headboard hack comes together in just a few hours and takes only 7 basic materials. I wanted something to elevate my bed and tie into the wallpaper, but I didn’t have the time or space for a full-scale bed frame. Rather than invest in a large piece of furniture I really wouldn’t want to have to move, I decided to go with a cross between wall art and headboard, bringing an upscale look to the space with minimal effort.
I had so many diy headboard ideas, but in the end I decided to go with a three panel padded version. You can make this your own by omitting padding, playing with the shape, and getting creative with the pattern.

How to DIY a Headboard
Materials:
- 1/4 plywood
- 1/4 foam
- Adhesive spray
- Fabric of choice,
- Staple gun & staples
- 3 mending plates (if creating multiple panels)
- French cleat for hanging
You’ll start by cutting your plywood down to your desired size or shape. I cut mine into three pieces, with the middle piece in a large rectangle, adorned with two smaller panels on the sides. Once you have your shape framed out, you’ll use spray adhesive to add the padding to each panel – this gives it that plush look that compliments your pillows.
Next, you’ll wrap your fabric around each panel and staple it to the back. Fold the edges like you’re wrapping a present and trim the excess fabric. If you used multiple panels, you’ll use the mending plates to stitch each part together. If you’d rather skip the plates and hang each portion separately, you can, but it’s much less hassle to bind it into one piece.
All that’s left to do is hang it up behind the bed! Just like that, your basic bed gets a major makeover.
Better Headboard, Better Sleep?
Like I said, the headboard won’t help you sleep better – it’s not magic. But who is to say that snoozing in style won’t level up your game?
From start to finish, this build took me about two hours, and the impact on my bedroom was well worth it. After all, the average person spends about 26 years of their life sleeping. You might as well do it in a room you love.